
Managing rooms
Create, edit and archive the rooms in your service.
Rooms are the spaces children and staff are assigned to. Setting them up is one of the first things to do when you create your school, and you can add, rename or retire rooms at any time as your service changes.
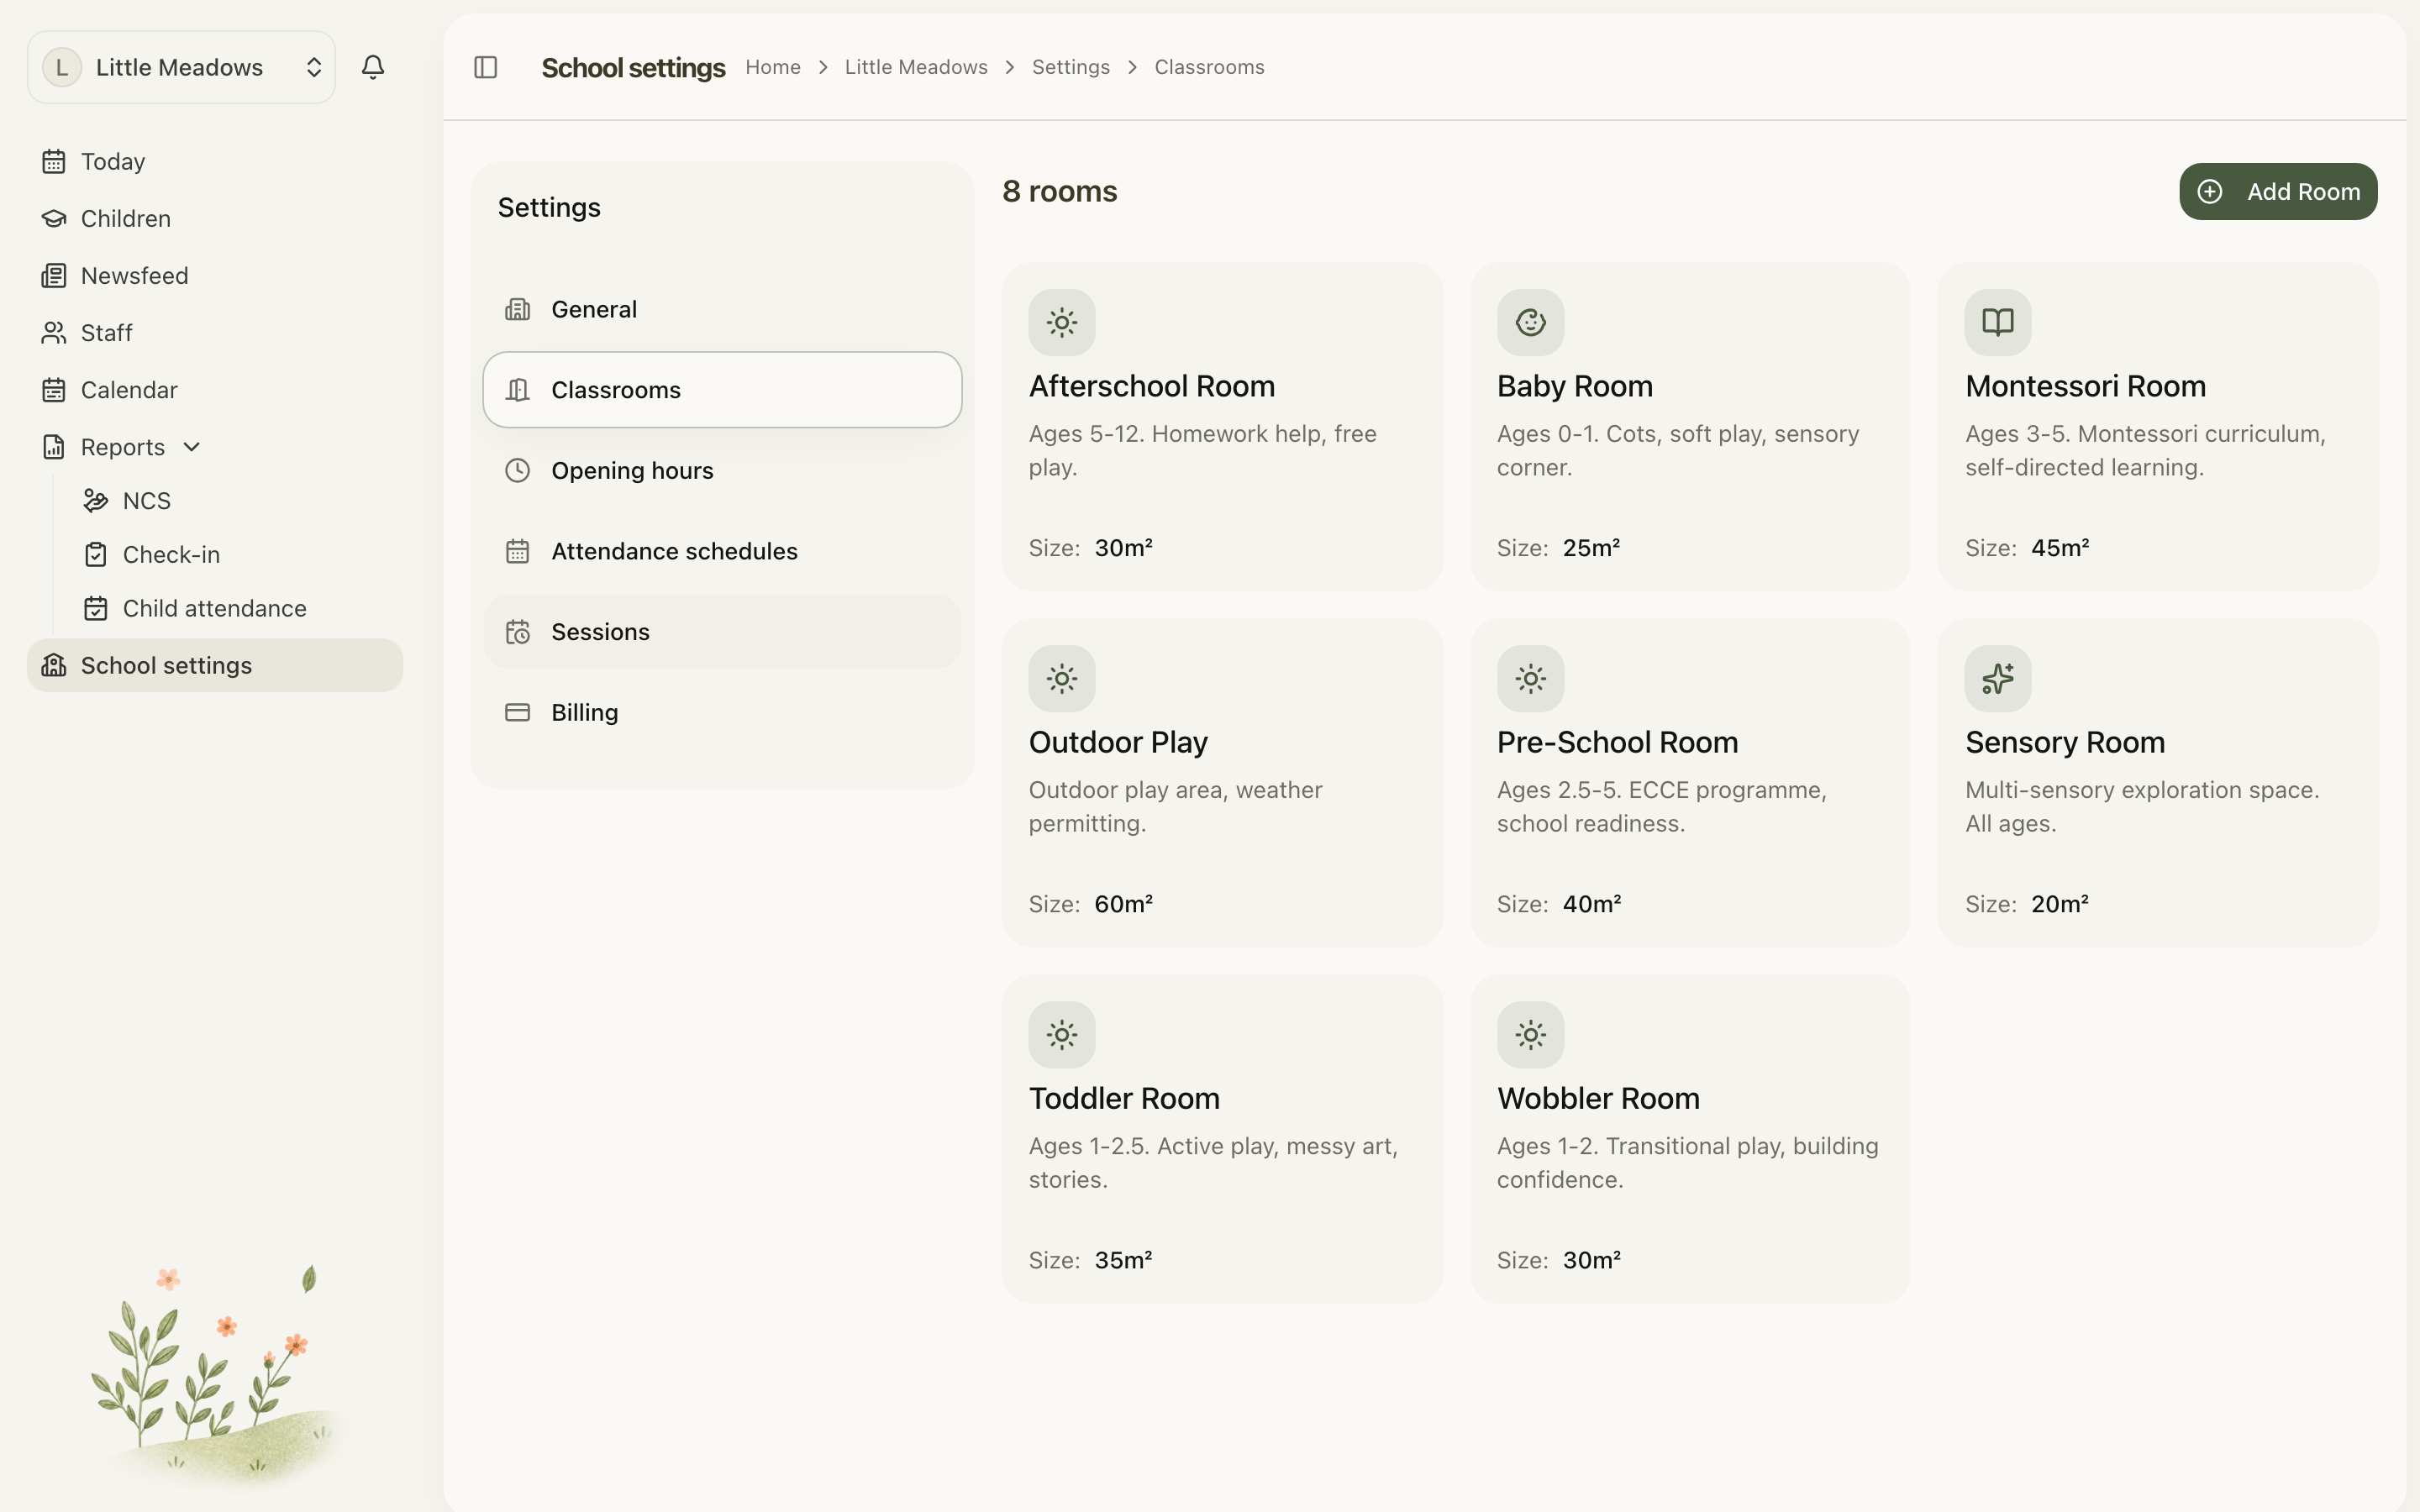
You'll find them under School settings → Classrooms.
Who can manage rooms
Only Owners and Managers can add, edit or archive rooms. Senior Practitioners and Practitioners can open the Classrooms tab and see every room, but the edit and archive controls are hidden from them.
The whole of School settings is staff-only — Parent and Family accounts can't reach it at all.
Note: Rooms are listed in a table, one room per row. The edit (pencil) and archive (trash) icons sit at the end of each row.
Adding a room
- Go to School settings → Classrooms.
- Choose Add Room (top-right). If you don't have any rooms yet, you'll see an Add Room button inside the empty-state card instead.
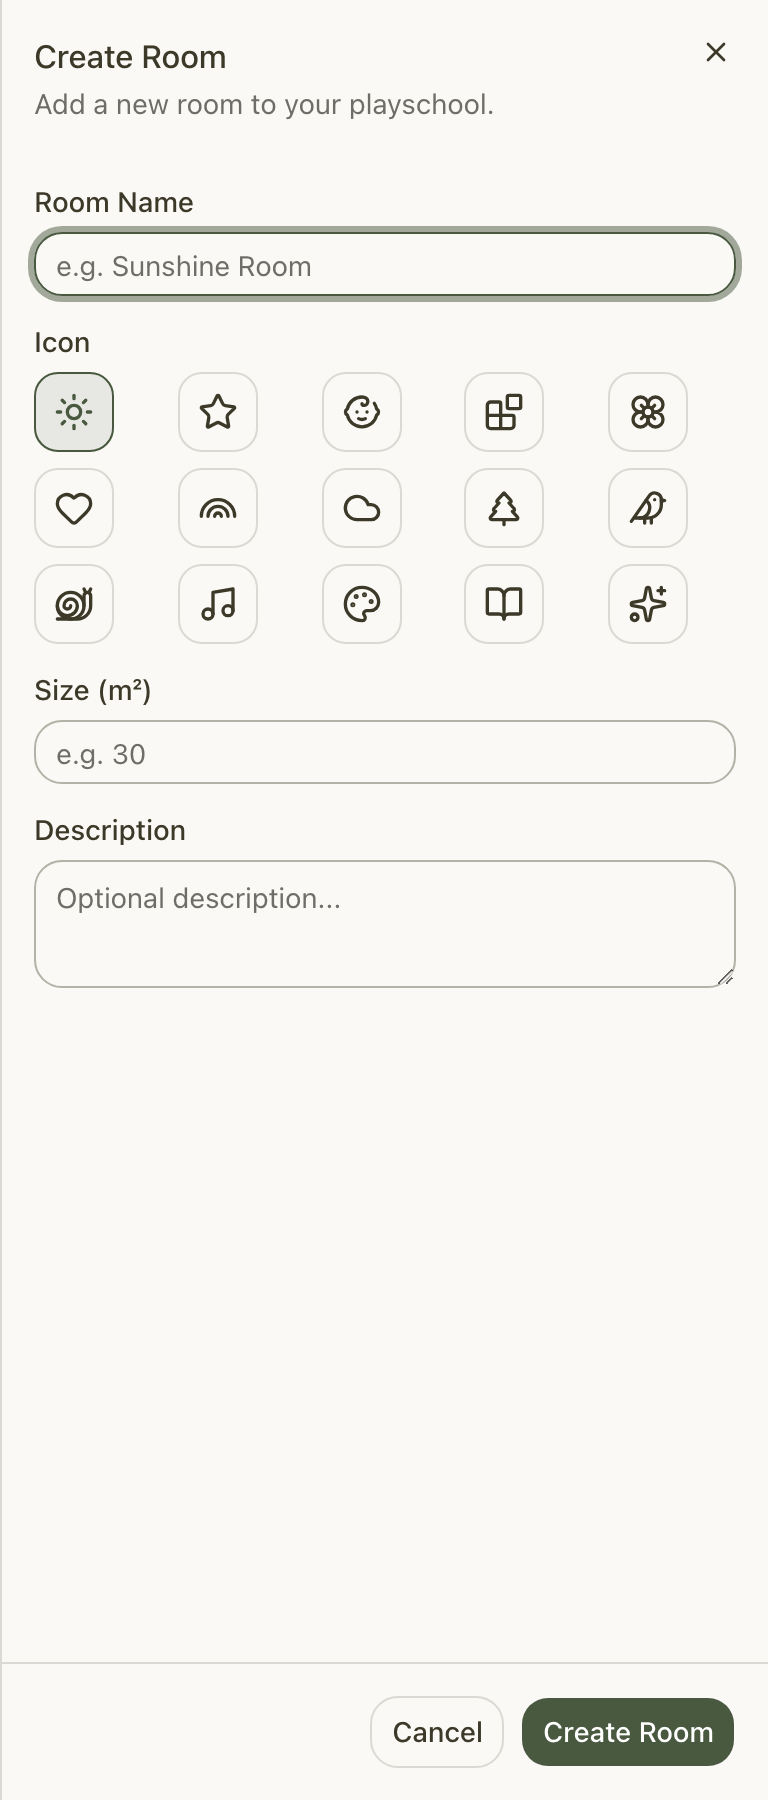
- In the Create Room sheet that slides in from the right, fill in the room's details:
- Room Name (required) — for example, "Sunshine Room".
- Icon — pick one from the grid of 15 icons so the room is easy to recognise at a glance. A sun icon is selected by default.
- Colour — one of eight colours, used wherever the room is shown in colour (the rooms table and the Schedules grid). The next unused colour is picked for you; colours another room already wears are marked with a dot. Once all eight are in use, rooms share a colour — the room's name is always shown alongside it.
- Age from / Age to, Capacity, Staff ratio and Size (all optional) — the ages the room takes, how many children it holds, the ratio you work to and its floor space. See Room ages, capacity and size.
- Description (optional) — any notes about the room.
- Choose Create Room.
The button shows Saving... while it works. When it's done you'll see a Room created successfully message and the sheet closes.
Editing a room
- On the Classrooms tab, find the room you want to change.
- Click the pencil (edit) icon at the end of its row.
- In the Edit Room sheet, update any of the details — Room Name, Colour, Icon, the ages, Capacity, Staff ratio, Size or Description.
- Choose Update Room.
You'll see a Room updated successfully message once it saves.
Archiving a room
When a room is no longer in use, you archive it rather than deleting it. Archiving is a soft delete: the room is hidden from everyday lists but can be brought back later, and all of its past attendance and assignments stay intact.
- On the Classrooms tab, find the room.
- Click the trash (archive) icon at the end of its row.
- In the Archive Room dialog, read the confirmation — "Are you sure you want to archive [room name]? This room will no longer be visible but can be restored later."
- Choose Archive Room.
You'll see a Room archived successfully message once it's done.
Common questions
Why can I only archive a room, not delete it? Rooms are archived rather than permanently deleted so your historical attendance and room assignments stay intact. Archiving hides the room from everyday lists, and it can be restored again later.
I entered a room size but it won't save. Size must be a positive number — decimals are fine (for example, 30 or 23.2). A zero or negative value brings up the message "Size must be a positive number". If you don't want to record a size, just leave the field blank; it's optional.
The Add Room, edit or archive buttons aren't showing for me. Two things to check. First, only Owners and Managers can manage rooms — Senior Practitioners and Practitioners can see rooms but not the controls, so ask an owner or manager to make the change. Second, the icons are at the end of each room's row in the table.